Embry-Riddle online course evaluations are a fast and easy way for students to give you feedback on your courses. Evaluations are an important process at ERAU and can help you with teaching pedagogy, faculty goals, assessment, enhancing your courses, aiding in your faculty performance review and meeting University’s goals.
All feedback is anonymous and confidential. Data is compiled and available to you approximately 10 days after the evaluations close and only AFTER final grades are submitted. The evaluations are housed by an independent vendor, EvaluationKIT, and all student identifying marks are purged before reports are compiled.
There are several methods to access your evaluations:
- ERNIE: Sign into ERNIE and locate "My Tools", then click on "All Tools". Once on the "Tools" page, locate "Course Evaluations" and click on it.


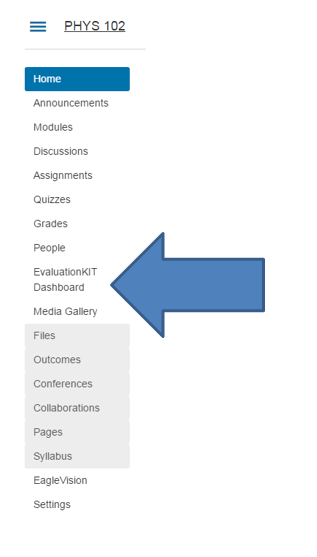
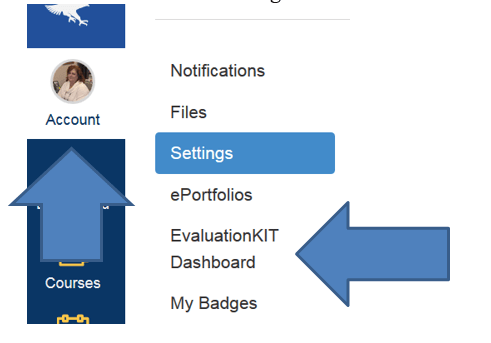
- Canvas: Sign into Canvas and select a course. Click on the link named "EvaluationKIT Dashboard" located on the left-hand menu. Alternatively, you can access using your Canvas global settings by clicking on "Account" then "Settings" on the left menu in Canvas.
- If you are using Internet Explorer, use or Google Chrome
- Be sure that your ‘pop-up’ blocker is off
- If you continue having problems email eraueval@erau.edu
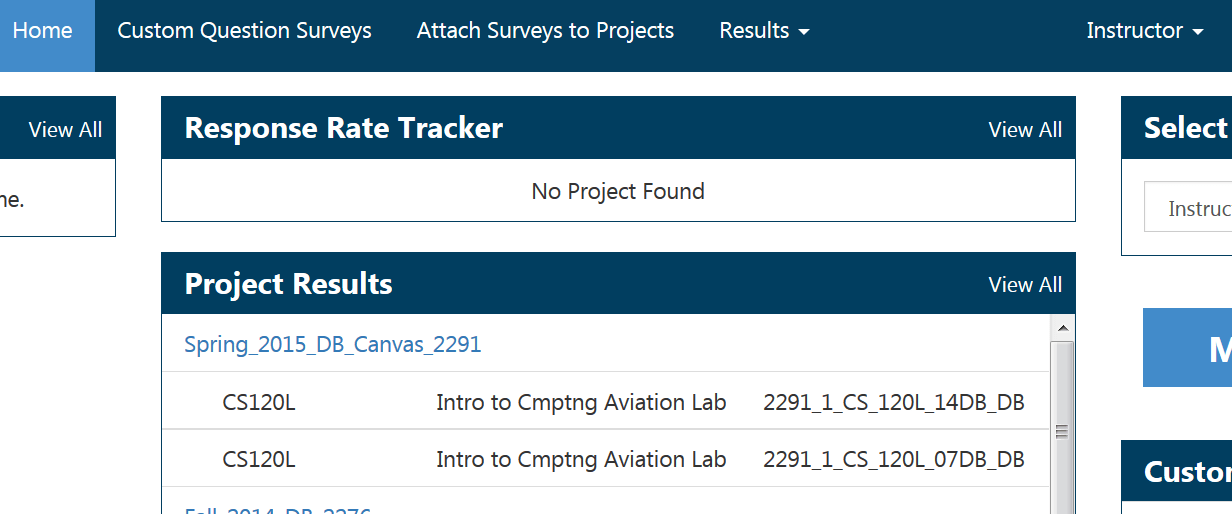
- Once you are at your EvaluationKIT dashboard, be sure you are signed in as an ‘instructor’ in the top right corner. You can also select your role on the left side of the dashboard. If no, use the drop down navigation arrow to switch your role to ‘instructor’. You will see the “Response Rate tracker” Module in the center. This response rate shows the aggregate response rate for all courses you are teaching in a term. Click on the project (term) (or view all if no current projects are showing) that you would like to generate a Respondent/Non-respondent list for.

- The next screen will show your individual response rate for each course. Click on the download button and then click on the ‘respondent’ link to begin the download. This list is only available after you have 4 respondents in the course.
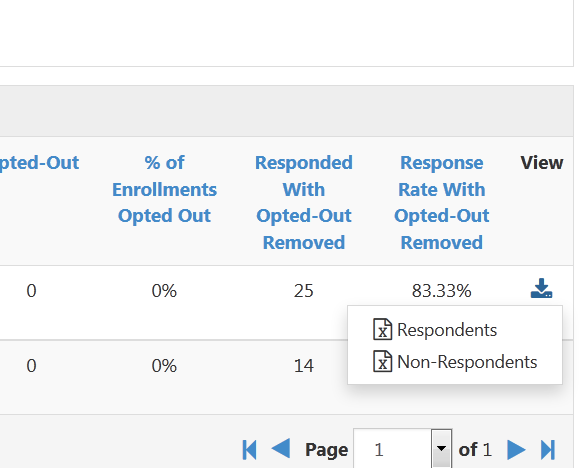
This list ONLY contains: Course code, Student first and last name, email, ERAU Username, Student ID and submit date/time. Data is never associated with any student identifying marks and is only available to faculty after grades are submitted.
Once you are at your EvaluationKIT dashboard, be sure you are signed in as an ‘instructor’ in the top right corner. If not, use the drop down navigation arrow to switch your role to ‘instructor’. You will see the “Project Results” Module in the middle of the dashboard. Click on the project (term) that you would like to view. (For more details, click on ‘?’ in the upper right corner of your EvaluationKIT dashboard.)

- We will save over 150,000 pieces of paper each year.
- Students have more time to complete thoughtful responses and provide meaningful comments.
- Faculty will no longer have to take class time to allow students an opportunity to complete their evaluations.
- Faculty will receive summary reports, including student comments, much more quickly. Reports can be distributed shortly after grades are submitted.
- Faculty will be able to easily create custom longitudinal reports for performance review and tenure package.
- Encourage your students to complete the evaluations: Students need to know that you value their input and that completing the evaluations is worth their time.
- Let students know they can access their evaluations by:
- In ERNIE, under the tool module click on the EvaluationKIT App link.
- In their course in Canvas, click on the course evaluation link on the left course menu.
- For face-to-face courses have students bring their laptops or mobile devices to class and follow either of the easy access instructions listed above.
- Check your response rates by following the access instructions listed above. You will be able to see your response rates for each class. If you have more than 4 respondents, you are able to download a list of non-respondents for personal follow-up. Note: The list ONLY contains: Course ID, Student first and last name, email, ERNIE user ID, Student ID and Submit date. No data is associated with this list.
- Navigate to access EvaluationKit in ERNIE

- When a project is available it will be listed in the box ‘Custom Questions’ on your home page (e.g., Fall_2015_PC_2321). ‘Access From’ and ‘Access Until’ dates will display indicating the days that you will be able to add custom questions. The delivery date indicates the date the course evaluation will be sent to students. Custom questions cannot be added once the course evaluation has been sent to students.

- Click the project name link to go the Custom Question Survey page, and then click on "Create New Survey"

- Add a Title such as ‘EGR200 Custom Questions’ and select ‘Save New’. (Note: Adding a description is optional).

- For "Select Question Type", use the pull-down arrow to select the question type. Note: The ‘Single Selection’ question type is a common question format. The process for creating a ‘Single Selection’ question will be outlined in the steps that follow. Please see below for an explanation of the various types of question formats available.
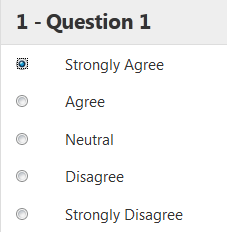
- ‘Single Selection’: allow the student to choose only one option from multiple response options.
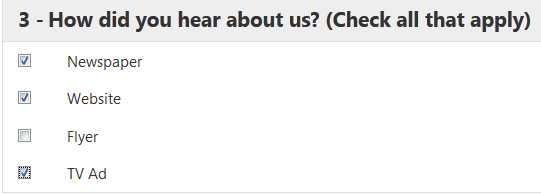
- ‘Multiple Selection’: Allows the student to check all response options that apply.
- ‘Matrix’: Has a common response scale with multiple items being evaluated and displays the questions as a matrix table. Students are allowed to choose only one response option per item.

- ‘Open Ended Text Response’: These questions provide a text box which allows the student to write out their response.

- ‘Single Selection’: allow the student to choose only one option from multiple response options.
- Under "Question Text", type in your question.

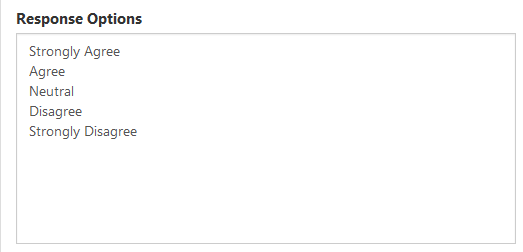
- Under "Response Options", change Options 1-5 to reflect the appropriate scale (e.g., Strongly Agree, Agree, Neutral, Disagree, Strongly Disagree).
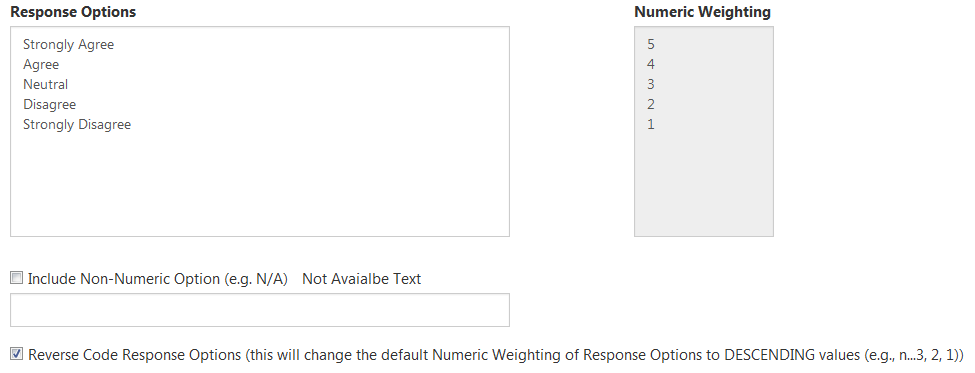
Note: It is common practice to associate more positive response options with higher numeric values in order to more readily interpret mean scores. For example, using a 5-pt scale, Strongly Agree to Strongly Disagree, the numeric values should be coded as follows: 5-Strong Agree, 4-Agree, 3-Neutral, 2-Disagree, 1-Strongly Disagree. Thus, higher mean scores would suggest stronger agreement. In order to weight the response items correctly, you will likely need to select the ‘Reverse Code Response Options’ box. You can determine the value associated with your response options by referencing the ‘Numeric Weighting’ box.
- Review your survey question and select the edit icon (‘pencil’ icon on the right) if necessary.
- Once you have added all of your custom questions (there is a maximum of 5), select ‘Save’ at the top of the page.
- Select the ‘Attach Surveys to Projects’ tab at the top of the page.
- Click the link to the Project Name.
- Select ‘Add Custom Question Survey’.
- Select the checkmark on the right next to your survey name and then click ‘Select Courses’ at the bottom of the page.
- Click the ‘Add Courses’ button at the bottom of the next page. This will open a dialog box that will allow you to check the box next to the course(s) to which you want to add the custom questions. When you have selected all the appropriate courses click the ‘Add Selected Courses’ button at the bottom of the page. A confirmation window will pop up confirming that you have added the custom questions- click ok.
In this scenario, you can view response rates as an instructor and submit evaluations if you are also taking courses. When you navigate to your EvaluationKIT dashboard, you are automatically signed in at your highest access level. After logging into the EvaluationKIT system, you will need to change your current role by clicking on the dropdown section beside your name. In the example below, the current role is “instructor”. In order to modify the role to “student”, click the dropdown and select “student/respondent”.
You should now view any evaluations you have pending as a student/respondent. Once you have completed any evaluations, simply modify your role to “instructor” again to view course response rates for any courses you are teaching.
Faculty Feedback
- Click on the link sent in the email from ERAUEval@evaluationkit.com
- Access your EvaluationKIT dashboard and change your role from ‘instructor’ to ‘student/respondent’ in the upper right corner next to your name
